“From a tiny spark may burst a mighty flame.” ~ Dante
Today in our Manual Focus Stacking series—
Blend together only a small portion (bucket) of images in a larger focus stack.
We talked about how Photoshop CC does a great job of blending together a series of images—until it doesn’t. Which means sometimes you’ll need to manually (sort of) do the work yourself.
We introduced the Photoshop CC’s File ~ Scripts ~ Load Files into Stack to open any set of images you want into a stack. Which we’ll get back soon. Which will be VERY important soon, once you’ve practiced breaking out parts of an image to blend together separate from the rest.
If you haven’t taken a look yet, link back and get caught up.
NOTE: This post isn’t meant to a primer on focus stacking or using Lightroom CC or Photoshop CC. We give you all the basic steps you’ll need to do each task. Please spend as much time as you need practicing your focus stacking skills and becoming familiar the basics of post-processing in these packages.
Three-bloom image manually (sort-of) blended in Photoshop CC
So…
What do I mean by a “buckets of images” that are only part of a larger series?”
To create the image to the right, where all three blooms are in focus, yet the background remains soft and swirly, I had to manually (sort of) focus stack each of the three blooms separately, and then blend them back together into a full series of images.
Wait… What?
Photoshop CC wasn’t blending my images to create sharply focused flowers. I wanted sharply focused flowers. So I took PS by the hand and showed it how I wanted things done.
How?
By manually deciding which areas to isolate into separate groups (buckets) of focus—and which areas I wanted the bokeh left untouched.
First off, I analyze my focus stack series of images, to make certain I have what I need:
Are there distinct areas in the full series that I want in sharp focus?
Can I successfully isolate those areas from the rest, given the series of images I’ve taken?
In my series of images, are there separate “buckets” of captures—subsets if images—that, when blended separate from the rest, will render the image with my desired areas in sharp focus?
In other words, this process works best if the areas you want sharp are large enough and separate enough to allow for manual blending. It helps if these areas also easily isolated from the rest of the image. Finally, you need enough sharpness throughout your full stack of images to be able to render your isolated areas sharply.
For the example of these flowers, did I take enough images in my full focus stack to allow me to get each flower in focus—if I blended only those images that focus on parts of a particular flower?
I realized I had all of that for this image. So, off I went…
Let’s begin at the begging. The full series must be loaded into Photoshop and aligned, so that any small movement or shift in the individual captures is neutralized.
The easiest way to do this is to begin in Lightroom, imported images as layers in Photoshop, and auto-align them there.
Eight (8) image focus stack series imported into Lightroom CC
Edit In ~ Open as Layers in Photoshop option
Here’s to do that:
Open the full stack of images in Lightroom CC. For this image, I had eight (8) individual captures.
Select/highlight the series of images.
Right click with your mouse.
From the drop down menu, select Edit In ~ Open as Layers in Photoshop… Which in this example is the very last option at the bottom of Edit In menu.
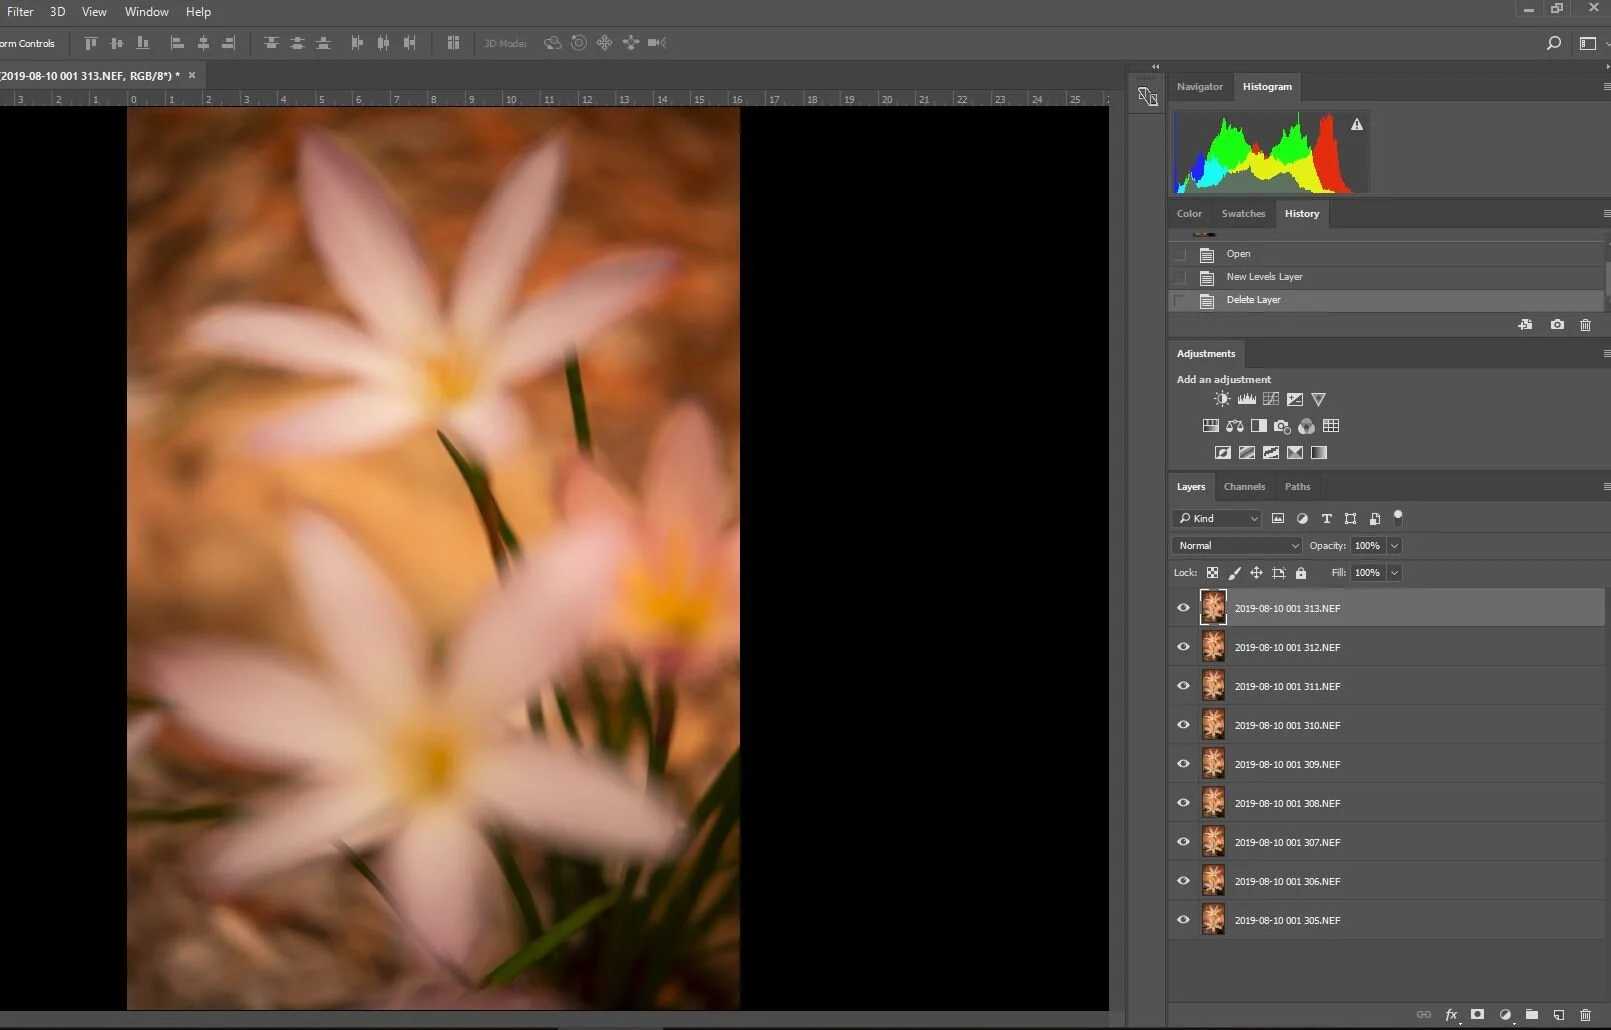
The result: the same series is now loaded in Photoshop CC:
Each image loads as a separate layer (stacked one on top of the other).
The series of images are in order (throughout the focus range).
The top image in the stack is the one displayed.
Photoshop CC focus stack of 8 images, created using Lightroom CC’s “Open as Layers” in Photoshop option
Next, you need to auto-align your layers.
NOTE: Auto-aligning layers isn’t always a straightforward process—often because your series includes movement or significant change from one image to the next. If you’ve captured your series with a tripod and the subject was still as you worked, auto-aligning should be a less-than-trying process. If you have difficulty with your series, consider re-shooting—and/or choosing a more stable subject.
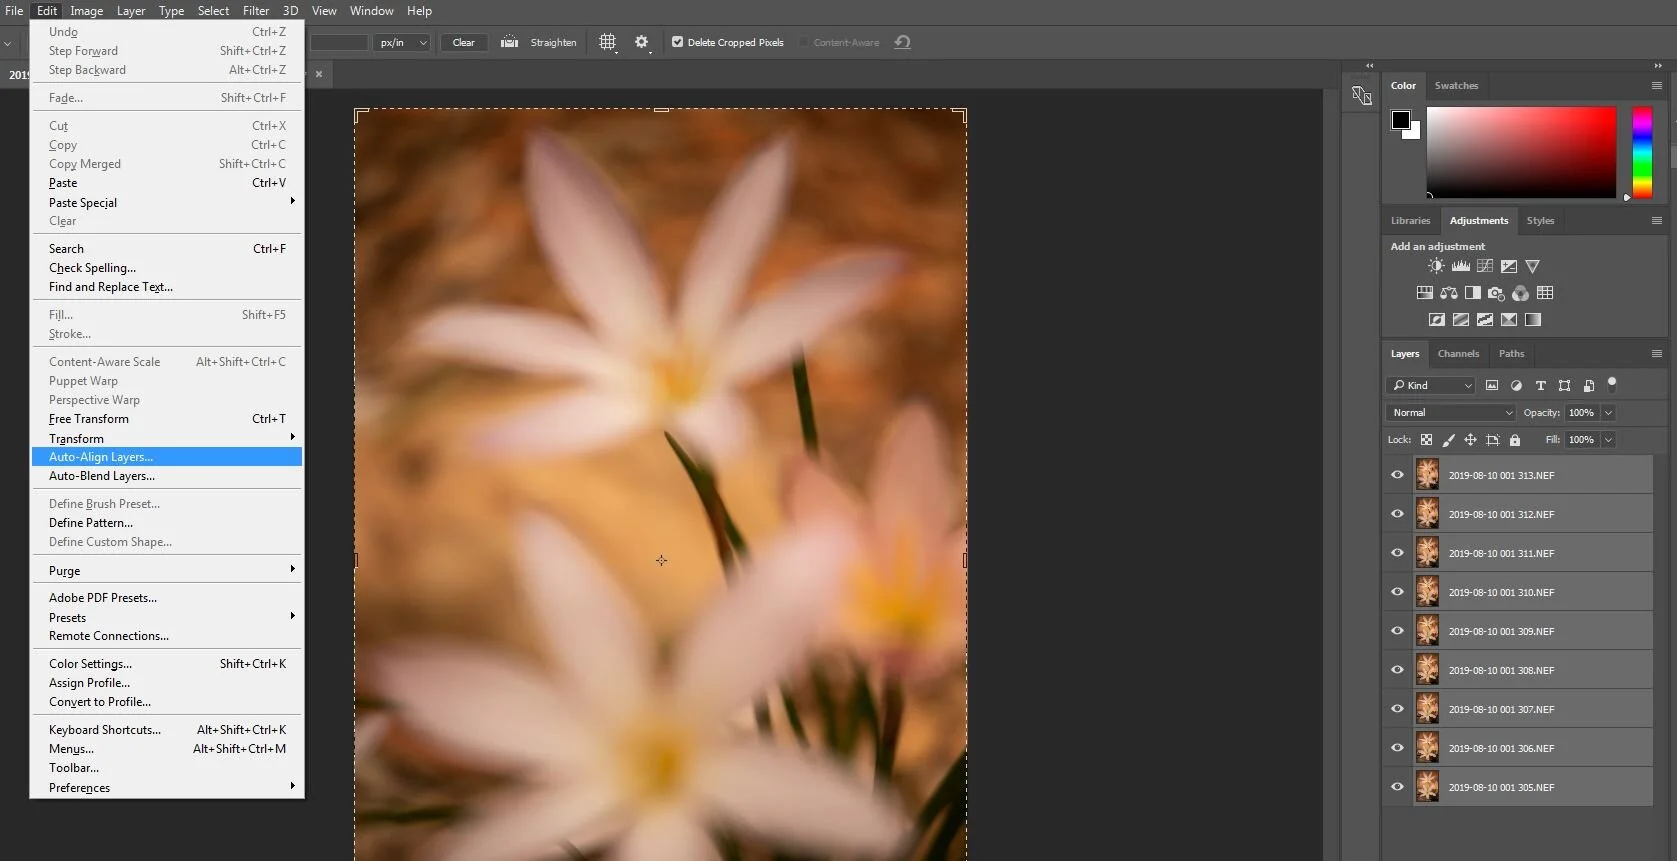
Auto-Align Layers option on the Edit menu
To auto-align image layers in a stack:
Select all the layers in the full stack of images.
From the Edit menu, select Auto-Align Layers.
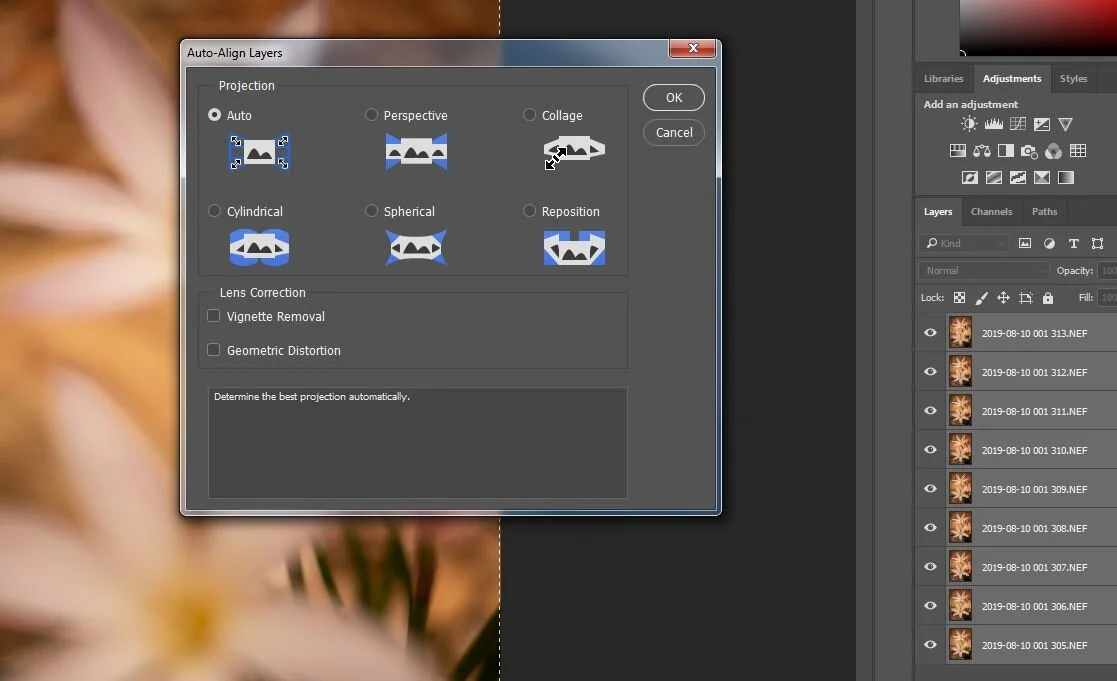
From the Auto-Align Layers box, select Auto and click OK.
Auto-Align Layers box
Next, SAVE the resulting stack of images as your FULL series of aligned images.
I save as a .tiff file.
Whatever format you choose, retain all the layers of images in your stack.
Let’s pause for a breather and consider what you’ve accomplished:
You’ve created is a solid baseline of images to work from.
You can now isolate individual parts of this series (“buckets” of focus) and manipulate different areas independently—that is, you can work with a single flower at a time.
Because you first auto-aligned your base stack, you can then piece back together the buckets of independent processing you do—into a new whole that has sharper focus where you need it.
Now, it’s time to isolate those “buckets” of sharper focus. You’re ready to get creative with how Photoshop CC will blend your images.
For my flower image, I needed the blooms as sharp as possible. Which first meant determining which of my 8 image layers focused on each flower.
But how do you find those “buckets” of images?
To isolate the first flower in the lower portion of my image, for example:
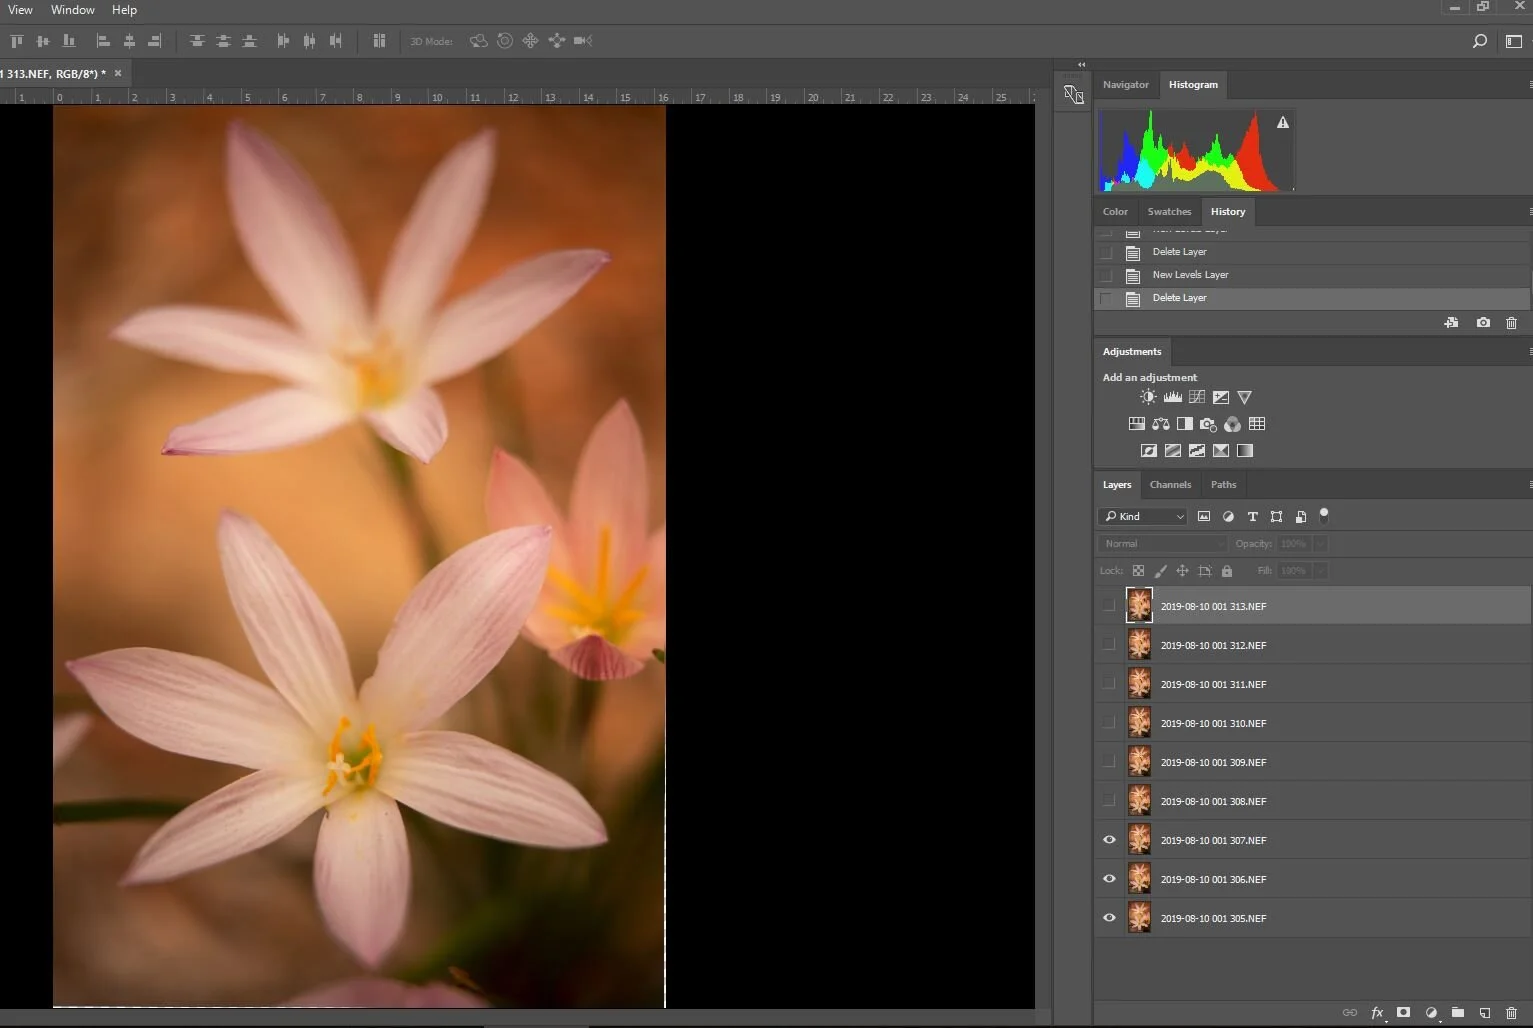
In Photoshop’s Layers panel (see the lower right of this image), you can reveal and hide layers as needed—by clicking the “eye” to the left of each image layer.
The top layer in a stack is what you see displayed—as long as it hasn’t been hidden in the Layers panel.
As you “hide” a layer, the image beneath it is revealed.
By hiding and revealing the layers in your image stack, you can determine what’s in focus in each layer.
This helps you isolate which image layers, when combined, would render a portion of your full image in focus.
For my first flower at the bottom of my full image, I determined that I’d needed a “bucket” of three images to create sharpness.
I revealed those layers (and only those layers) at the bottom of my aligned stack.
The other images in my stack are hidden.
The top layer of the revealed images is displayed (the top layer that focuses on my first flower).
Flower 1, with only its “sharp” layers revealed.
Now it’s time to isolate that “bucket” of images, so they can be blended together separately from the rest. Here, that means creating a version of my aligned series that only contains the images with my first flower in focus.
Select “hidden” layers, so you can remove them from the stack
First, create a copy of the entire stack of images.
From the File menu, select Save As and give use a different file name (I kept the original fine name and added FIRST ONE so I’d know this was the “bucket” of first flower images). Again, I save as .tiff file. Be certain your file format choice retains layers.In this new file, select all the “hidden” layers in your stack.
Click and drag the hidden layers to the trash can at the bottom right corner of your Photoshop CC screen.
Save the “shorter” stack of images.
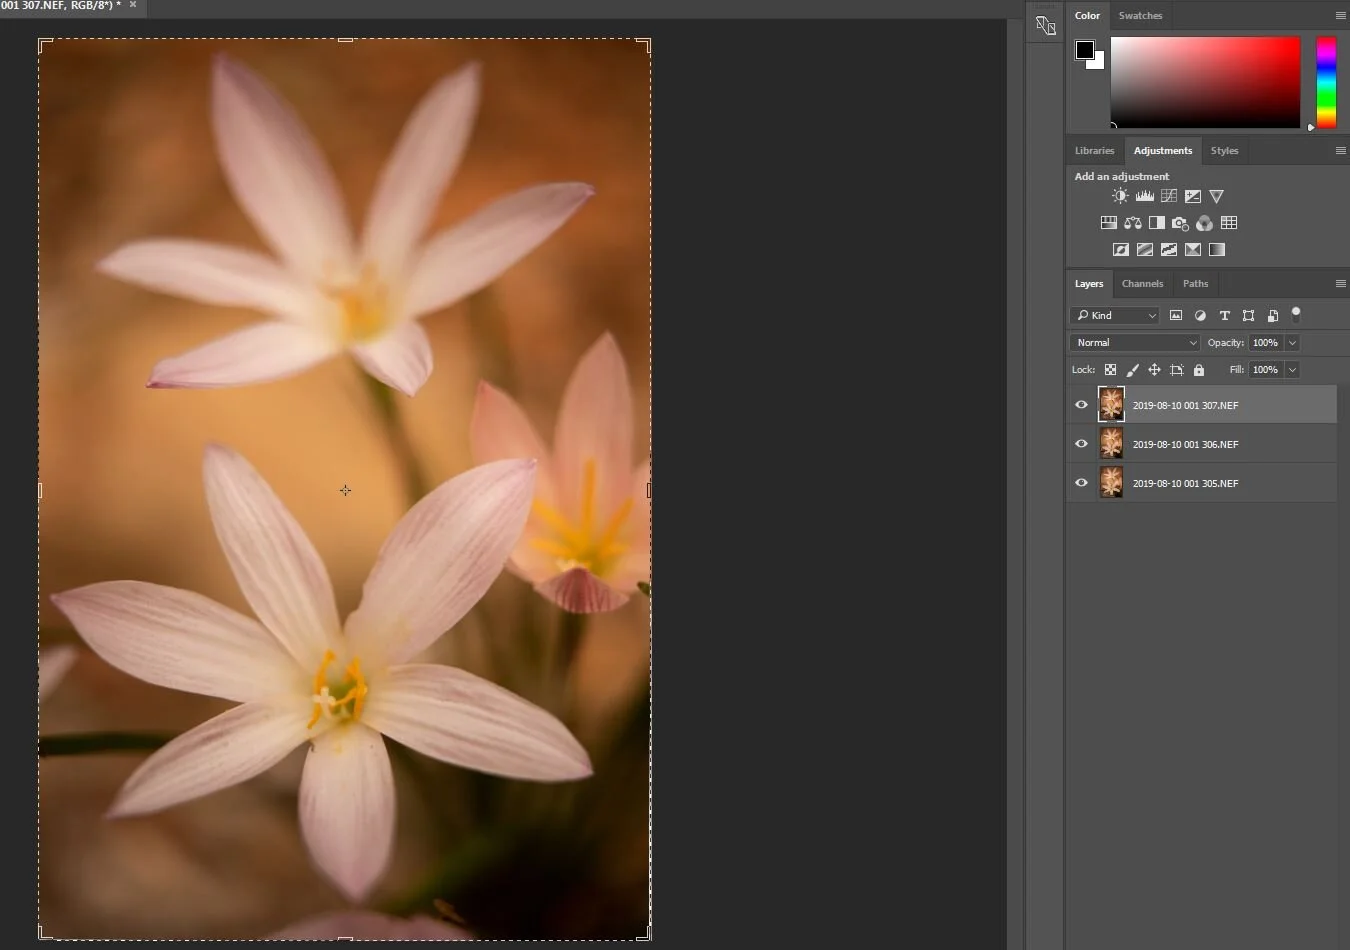
Flower 1 Series (a “bucket” of three layers where flower 1 is sharp)
The result is a “bucket” of image layers—a new photo series that includes only those layers showing detail for a desired area in your image.
In this example, I’ve isolated the images that give me detail for my first flower.
The top layer in the shorter stack is displayed—as you can see only a portion of the first flower is in focus.
If I were to hide this top layer, I’d reveal the sharper areas in the layer(s) beneath.
You’ll need to repeat this process for each area of the image you want in focus—creating subsets of the original aligned series, in which only desired focus layers are included.
Be certain to Save As each time, so you retain the initial, fully-aligned stack of images.
For my example, I created three smaller “buckets” of images—one for each flower I wanted in focus.
In addition to my original, full series of images, I created three smaller series, one for each of my flowers.
In this post, we’ve
Discussed the what makes an image a good candidate for manually (sort of) focus stacking
Imported a focus stack series into Lightroom CC
Opened those images as a stack in Photoshop CC
Illustrated how to reveal “buckets” of images that focus on portions of a larger series of captures
Created new files (subsets of the full image series) that include “buckets” of layers that focus on only a specific portion of an image
A fun post-processing project! And a lot of information to take in.
Spend some time with this post. Find or shoot a focus stack series of your to practice with. Get comfortable with the various techniques needed to break a larger series of captures into subsets of images you can work with independent of the whole.
Then come back for the next segment(s) of this series! Where we’ll
Blend these smaller series separately
Demonstrate how to stack the results back together into a new “full” image series
Illustrate how to process the end result, blending in your background and smoothing out any other issues you encounter.


